There are 0 items in your cart
Total
$0.00
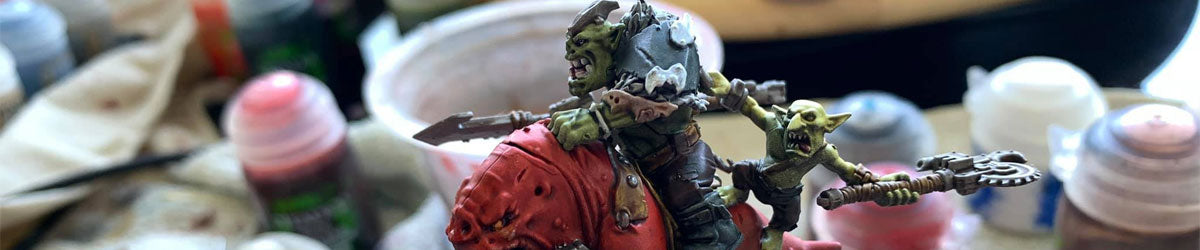
Miniatures can light up a game night - whether you’ve gotten huge, awesomely detailed miniatures from that one game you kickstarted a year ago, or want to take your RPG table to the next visual level with a fully painted miniature Tiamat to slam on the table, here are some tips and tricks for your mini painting adventure! This guide is aimed at priming (Hehe, get it?) beginners for the small, useful tools they need to kickstart their hobby, or a refresher for long time painters, who want to hear the highlights of painting at Vault!

Here at Vault we want to help demystify the ancient art of miniature painting - so we’re starting with some basic advice. When you’re working on a tiny canvas (or, in this case, model) you don’t need too much paint! Using a lightly wet paper towel on top of a paper plate can help you create a basic wet palette. By dabbing your brush into the paint, then onto the palette, you will help thin the paint so it will apply smoother to your mini, won’t clump and will be less wasteful of product. Oh, and the plastic cups are for water. That part was a little obvious, we thought.
If you ever want to upgrade your wet palette but don’t yet want to make the jump to the killer Red Grass ones we stock, fold a Chux cloth into a takeaway container, add water until the cloth is soaked enough that when you press on it, a puddle forms on your finger, then cut a piece of white baking paper to size and lay it on top. You can close up the takeaway container and use the paint added again another day!
What may be surprising about brushes is that smaller isn’t always better. For some areas of larger swathes of colour, such as a cloak, long tunics and robes, or a large shield, using a large brush will help cover an area quicker than dabbing away with a smaller brush. For techniques like dry brushing (used to catch on raised and modelled details of a figure, and add weathering) a large, flat headed brush may be more useful!
What is important is having an arsenal of brushes - thinking of your brushes as tools for unique jobs is a good way to begin building a brush collection. Here at Vault we have a few options - such as the Broken Toad brush set if you’re looking for some good starter brushes, or if you’re keen for a larger range from the get-go, there is the Wolf Bristle Brush set from Brisbane-locals Chronicle Cards.
 Third step - Make colours work smarter, not harder
With miniatures, you may be tempted to go in and paint the most exciting elements first - the small, perfectly detailed waist belt and spell tome, or the intricate curl of flame swirling from the tip of a blaster. With minis you want to think a little more basically - consider the darkest shade you want as the base on your miniature’s clothes, in their hair, or on their armour. Slowly building to the true shade you want as the highlights help create a better sense of depth and shadow to your minis. If, for example, you wanted your Space Marine’s armour a brighter red like red like the armour of a Blood Angel, you may want to start with a Khorne Red, to help build in that shadow, then layer up using Wazdakka Red and highlight with Evil Sunz Scarlet. Considering where and how you want lighting to shine on your minis will take them from good to great!

Hopefully this introduction has cleared a few key steps in your miniature painting journey. If you’re keen to get started, Vault has lots of ways to get you involved today - try dropping in anytime to use our miniature paint stations, equipped with paint brushes and paints! If you’re looking to hone your skills, keep an eye out for our Hobby Hangout Twitch streams, featuring local artists like Pegapaints https://www.twitch.tv/vaultgameslive ! And if you’re keen for a class, why not try our Learn to Paint night, coming up on the 24th of March at 6pm!
